Hosting Hugo on GitHub
Hosting your static site on Git Hub.
This post assumes that you followed this tutorial to create your hugo static site on local machine.
Create a repo on GitHub
To host your site on github you need to create your repo with a particular name
<username>.github.io
You should push your repo here.
Add this file to automate github actions
name: github pages

on:
  push:
    branches:
      - main  # Set a branch to deploy
  pull_request:

jobs:
  deploy:
    runs-on: ubuntu-20.04
    steps:
      - uses: actions/checkout@v2
        with:
          submodules: true  # Fetch Hugo themes (true OR recursive)
          fetch-depth: 0    # Fetch all history for .GitInfo and .Lastmod

      - name: Setup Hugo
        uses: peaceiris/actions-hugo@v2
        with:
          hugo-version: 'latest'
          # extended: true

      - name: Build
        run: hugo --minify

      - name: Deploy
        uses: peaceiris/actions-gh-pages@v3
        if: github.ref == 'refs/heads/main'
        with:
          github_token: ${{ secrets.GITHUB_TOKEN }}
          publish_dir: ./public
Add it to
.github/workflows/gh-pages.yml
Push to github
Now try to push to github if you get an error
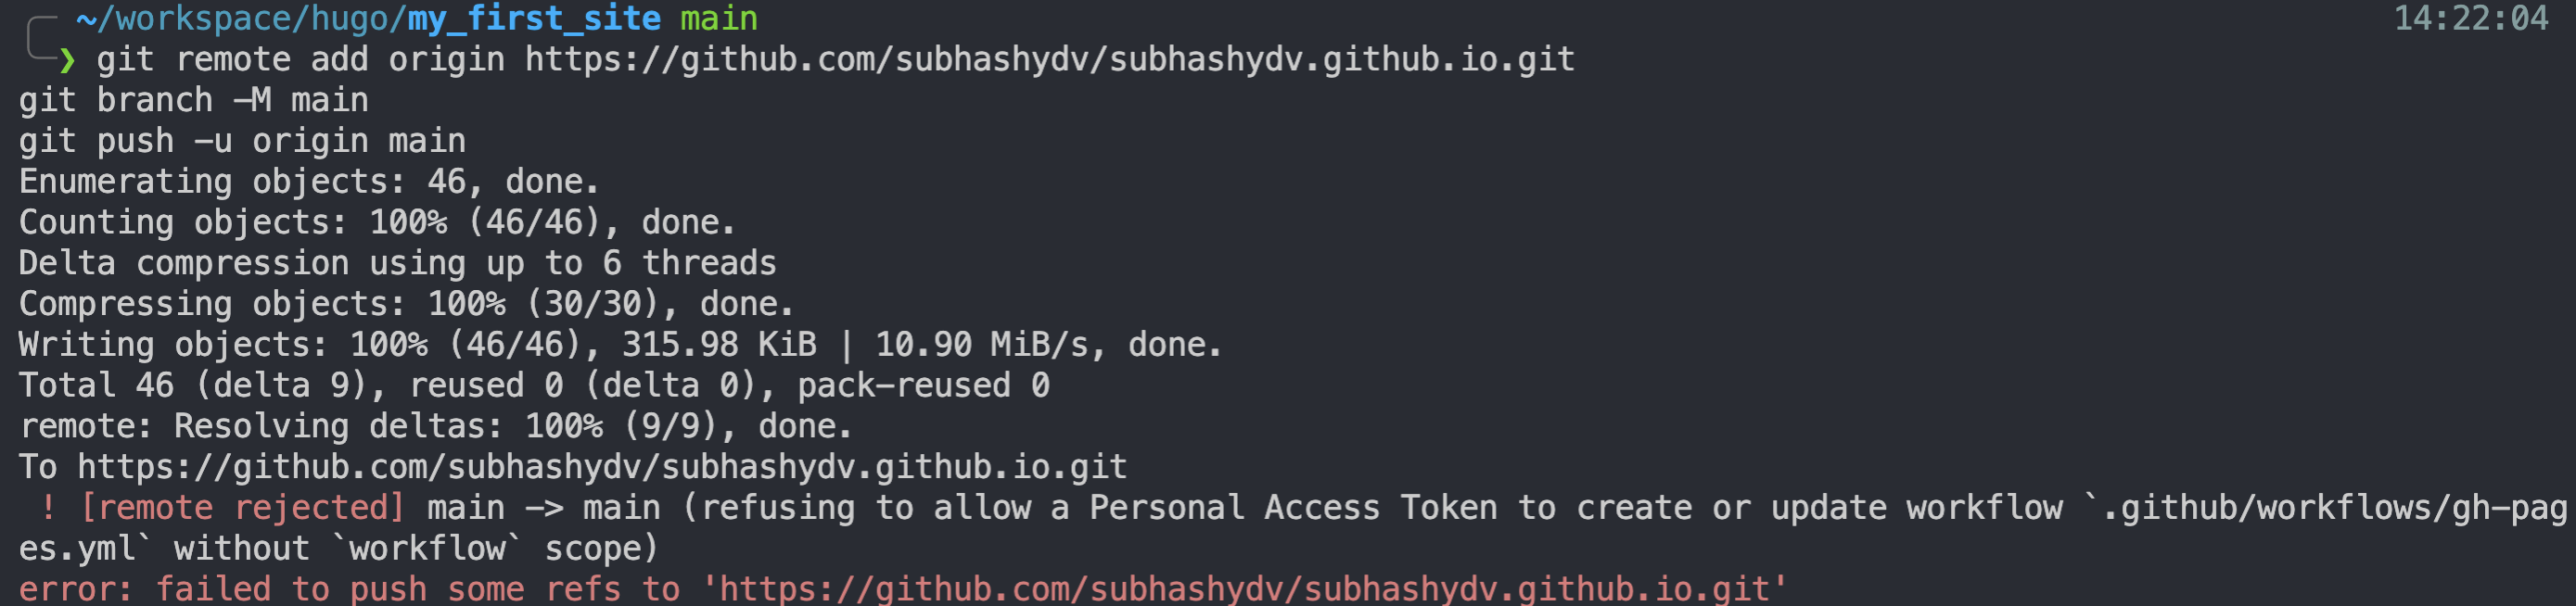
You need to ensure that in your Git Hub settings
developer settings > personal access tokes
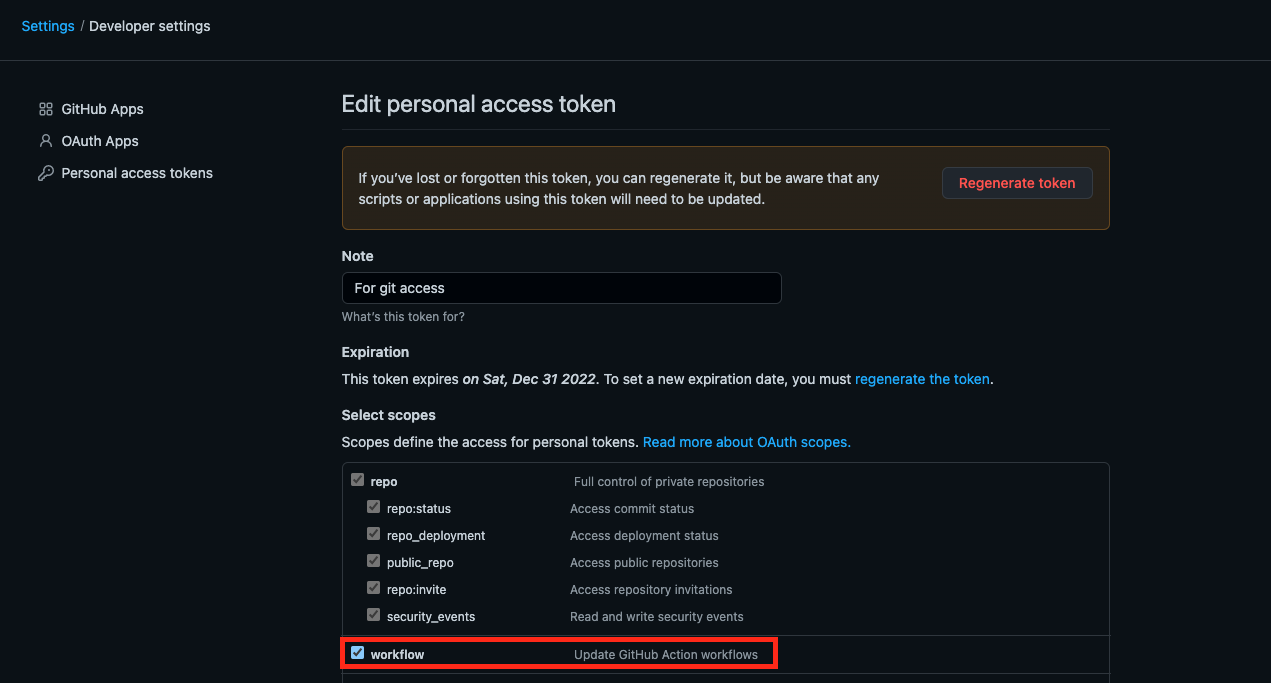
You have checked workflows if you haven’t check it now and update your token.
Now when you push it should work.
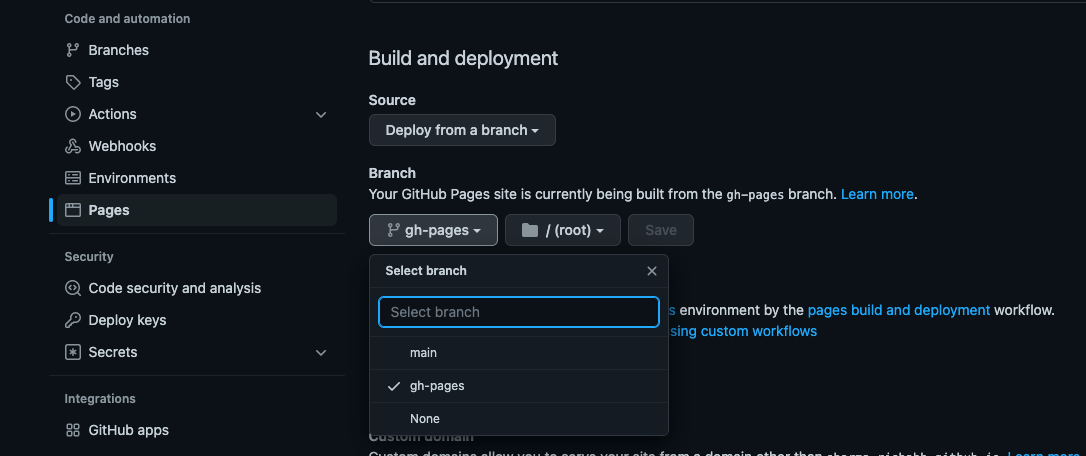
Changing branch in git hub pages.
First you need to make sure you have a gh-pages branch on your git hub
It should be there becuase the github action yml we added earlier would automatically do it for you.
Now you just need to go to your repo settings and ensure that your git hub pages branch is set to gh-pages.
Accessing your site
Change the base url in your config.toml to your git pages url.

Now you should be able to access your site at <username>.github.io. Git Hub might take a few minutes to publish your site but it will get built.